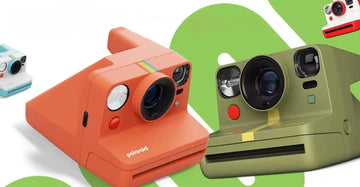
Mastering Exposure Control on Your Polaroid 600 Camera: A Beginner's Guide
by Дашка Шипунова on Jul 29, 2025

As a passionate instant film photographer, I know the thrill of capturing the perfect Polaroid shot. However, one common challenge many beginners face is getting the exposure right - those images can sometimes turn out too bright or too dark. Fear not, my fellow Polaroid enthusiasts! In this comprehensive guide, we'll dive deep into understanding and leveraging your camera's exposure correction feature to take your 600 series photos to the next level.
Understanding Exposure Correction on Polaroid 600 Cameras
At the heart of every Polaroid 600 camera lies a nifty little feature called exposure correction. This handy slider allows you to manually adjust the camera's exposure settings, giving you greater control over the final outcome of your images.
The exposure correction slider is typically located on the front or side of your Polaroid 600 camera, and it usually ranges from a black arrow on the left to a white arrow on the right. The default, or neutral, position is typically in the middle. By adjusting this slider, you're essentially telling your camera to capture more or less light, resulting in brighter or darker images.
When to Use Exposure Correction
So, when should you consider using the exposure correction feature on your Polaroid 600 camera? There are a few key scenarios where it can come in handy:
- Bright Conditions: If you're shooting in very bright, sunny conditions, your Polaroid images may turn out overexposed and too bright. In this case, you'll want to move the exposure correction slider towards the black arrow to reduce the amount of light captured.
- Low Light Conditions: Conversely, if you're shooting in low-light situations, your Polaroid photos may come out underexposed and too dark. Here, you'll want to move the slider towards the white arrow to increase the exposure and brighten up your shots.
- Difficult Lighting: Sometimes, the lighting conditions can be tricky, with a mix of bright and dark areas in the frame. In these cases, you may need to experiment with the exposure correction slider to find the right balance and avoid blown-out highlights or murky shadows.
It's important to note that the recommended exposure settings can vary depending on the type of Polaroid film you're using. For example, with the current Impossible Project color film, it's generally best to leave the exposure correction slider in the default, middle position. However, with older or more specialized films, you may need to adjust the slider to achieve the desired results.
Mastering Exposure Correction Techniques
Now that you understand when to use exposure correction, let's dive into some practical techniques for getting the most out of this feature:
1. Bracketing Shots
One of the best ways to nail the exposure on your Polaroid 600 photos is to bracket your shots. This involves taking multiple exposures of the same scene, each with a different exposure correction setting. For example, you might take one shot with the slider in the default position, one with it moved towards the black arrow, and one with it moved towards the white arrow.
By bracketing your shots, you increase your chances of capturing the perfect exposure, and you can also experiment to see which setting works best for the particular lighting conditions and subject matter. This technique is especially useful when you're shooting in challenging or variable lighting situations.
2. Previewing and Adjusting
Another helpful technique is to take a test shot, review the results, and then adjust the exposure correction accordingly. This allows you to fine-tune your settings based on the actual output of your Polaroid camera, rather than relying solely on guesswork.
For example, if your first shot comes out too bright, you can move the exposure correction slider towards the black arrow and try again. Conversely, if the image is too dark, you can shift the slider towards the white arrow. This iterative process can help you quickly dial in the perfect exposure for your scene.
3. Considering Subject and Lighting
When using exposure correction, it's also important to consider the specific subject matter and lighting conditions of your scene. Certain subjects, such as bright, reflective surfaces or dark, shadowy areas, may require more or less exposure correction than others.
For instance, if you're photographing a bright, snowy landscape, you may need to move the exposure correction slider towards the black arrow to prevent the highlights from being blown out. Conversely, if you're shooting a dimly lit interior, you may need to shift the slider towards the white arrow to ensure your subject is properly exposed.
By taking the time to assess the lighting and subject matter, you can make more informed decisions about how to adjust the exposure correction slider for the best results.
Polaroid 600 Camera Accessories to Enhance Exposure Control
In addition to mastering the exposure correction slider on your Polaroid 600 camera, there are also a few accessories that can help you take your instant film photography to new heights:
1. Neutral Density Filters
Neutral density (ND) filters are a valuable tool for Polaroid photographers, as they allow you to reduce the amount of light entering the camera. This can be particularly useful in very bright, sunny conditions, where the exposure correction slider alone may not be enough to prevent overexposure.
By attaching an ND filter to the front of your Polaroid 600 camera, you can effectively "darken" the scene, giving you more flexibility with the exposure correction slider and helping you achieve the perfect balance of light and dark in your images.
2. Close-Up Lenses
If you're interested in capturing close-up, macro-style shots with your Polaroid 600 camera, a close-up lens can be a game-changer. These specialized lenses attach to the front of your camera and allow you to focus on subjects that are much closer than the camera's standard lens can handle.
When shooting close-up subjects, the lighting and exposure can be more challenging, as the camera may struggle to properly expose the scene. By using a close-up lens in conjunction with the exposure correction slider, you can fine-tune the exposure and capture stunning, detailed Polaroid shots.
One great option for Polaroid 600 cameras is the Polaroid 636 Close Up model, which features a built-in close-up lens for easy macro photography.
Putting it All Together: Exposure Mastery for Polaroid 600 Photography
Mastering exposure control on your Polaroid 600 camera is a crucial step in becoming a confident and creative instant film photographer. By understanding the exposure correction slider, learning techniques like bracketing and previewing, and leveraging helpful accessories, you'll be well on your way to capturing stunning, well-exposed Polaroid shots every time.
Remember, the key to success is experimentation and practice. Don't be afraid to try different exposure settings, adjust your approach based on the lighting and subject matter, and keep refining your technique. With time and dedication, you'll develop a keen eye for exposure and be able to consistently produce Polaroid images that capture the magic of the moment.
So, what are you waiting for? Grab your Polaroid 600 camera, load up some film, and start exploring the world of exposure control. Happy shooting!